
How to install a top view neon flex?
Mon 10,2025
Leave a message
Hey there! As a supplier of top - notch Top View Neon Flex, I'm super stoked to share with you how to install this amazing lighting product. Whether you're a DIY enthusiast or a professional installer, this guide will walk you through the process step by step.
What is Top View Neon Flex?
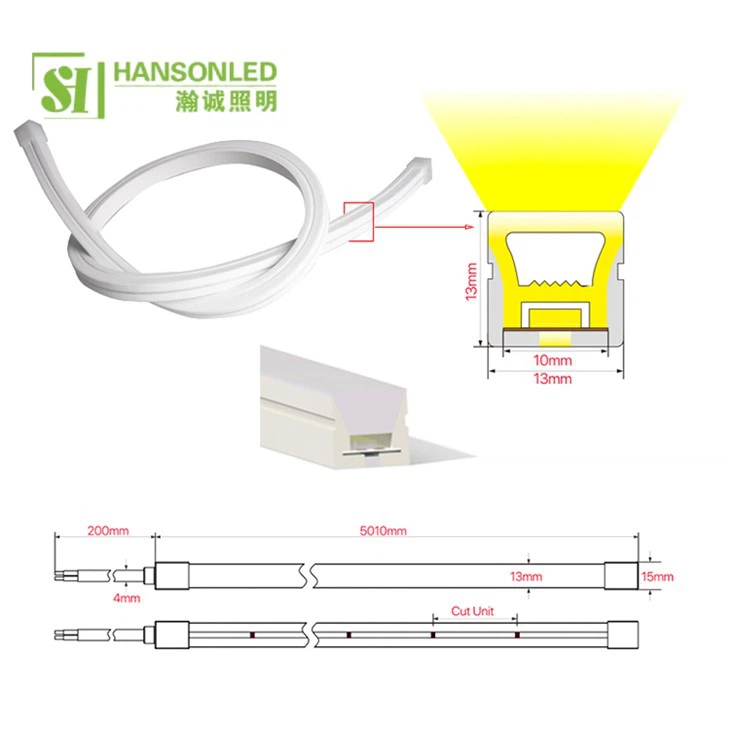
Before we dive into the installation, let's quickly talk about what Top View Neon Flex is. It's a modern alternative to traditional neon lights. It's made of flexible PVC tubes with LED strips inside, which gives it the flexibility to be bent into various shapes. And the top - view design means the light emits mainly from the top, creating a really cool lighting effect. We offer different models like the Top View Neon Flex 1313, Top View Neon Flex 1616, and Top View Neon Flex 1010, each with its own unique features and applications.
Tools and Materials You'll Need
First things first, gather all the tools and materials required for the installation. You'll need:
- Top View Neon Flex: Obviously, this is the star of the show. Make sure you have the right length and color for your project.
- Power Supply: Choose a power supply that is compatible with your neon flex. The wattage and voltage should match the requirements of the product.
- Mounting Tape or Clips: These are used to secure the neon flex in place. Mounting tape is great for smooth surfaces, while clips are more suitable for uneven or textured surfaces.
- Wire Cutters and Strippers: You'll need these to cut the neon flex to the right length and strip the wires for connection.
- Soldering Iron and Solder (Optional): If you want a more secure electrical connection, soldering can be a good option. But it's not always necessary.
- Electrical Tape: To insulate the electrical connections and prevent any short - circuits.
Step 1: Plan Your Installation
Before you start cutting and sticking, take some time to plan out where you want to install the Top View Neon Flex. Measure the area and decide on the shape and length of the neon flex you'll need. Sketch out a rough design on paper if it helps. Consider the power source location and how the wires will be routed. You don't want to end up with a mess of wires or have to move the power supply around constantly.
Step 2: Cut the Neon Flex
Once you have your plan in place, it's time to cut the neon flex to the right length. Most Top View Neon Flex products have cutting marks at regular intervals. Use the wire cutters to make a clean cut at these marks. Make sure to wear safety goggles to protect your eyes from any flying debris.
Step 3: Prepare the Power Supply
Next, you need to prepare the power supply. Find a suitable location for it, preferably close to the installation area but in a dry and safe place. Make sure the power supply is turned off before you start making any connections. Connect the wires from the power supply to the appropriate terminals. Usually, there will be a positive (+) and a negative (-) terminal. Double - check the connections to ensure they are secure.
Step 4: Mount the Neon Flex
Now comes the fun part - mounting the neon flex. If you're using mounting tape, peel off the backing and stick the neon flex to the surface. Press firmly to ensure good adhesion. If you're using clips, simply attach them to the surface first and then slide the neon flex into the clips. Make sure the neon flex is straight and evenly spaced.
Step 5: Connect the Neon Flex to the Power Supply
After mounting the neon flex, it's time to connect it to the power supply. Strip the ends of the wires on the neon flex using the wire strippers. Then, connect the positive wire of the neon flex to the positive terminal of the power supply and the negative wire to the negative terminal. You can use electrical tape to insulate the connections and prevent any short - circuits. If you're using a soldering iron, solder the wires for a more permanent connection.
Step 6: Test the Installation
Once all the connections are made, it's time to test the installation. Turn on the power supply and see if the neon flex lights up. If it doesn't, check the connections again to make sure everything is properly connected. Look for any loose wires or short - circuits. If you find any issues, turn off the power supply and fix them before trying again.
Step 7: Finishing Touches
If everything is working fine, you can make some finishing touches. Trim any excess wires and tuck them away neatly. You can also use additional mounting tape or clips to secure the wires in place. Make sure the installation looks clean and professional.
Troubleshooting Tips
- Neon Flex Not Lighting Up: Check the power supply to make sure it's working properly. Also, double - check the electrical connections to ensure they are secure.
- Uneven Lighting: This could be due to a faulty LED strip or a poor connection. Check the neon flex for any damaged sections and replace them if necessary.
- Overheating: If the neon flex or the power supply gets too hot, it could be a sign of an overloaded circuit. Make sure you're using the right power supply for the length and wattage of the neon flex.
Why Choose Our Top View Neon Flex?
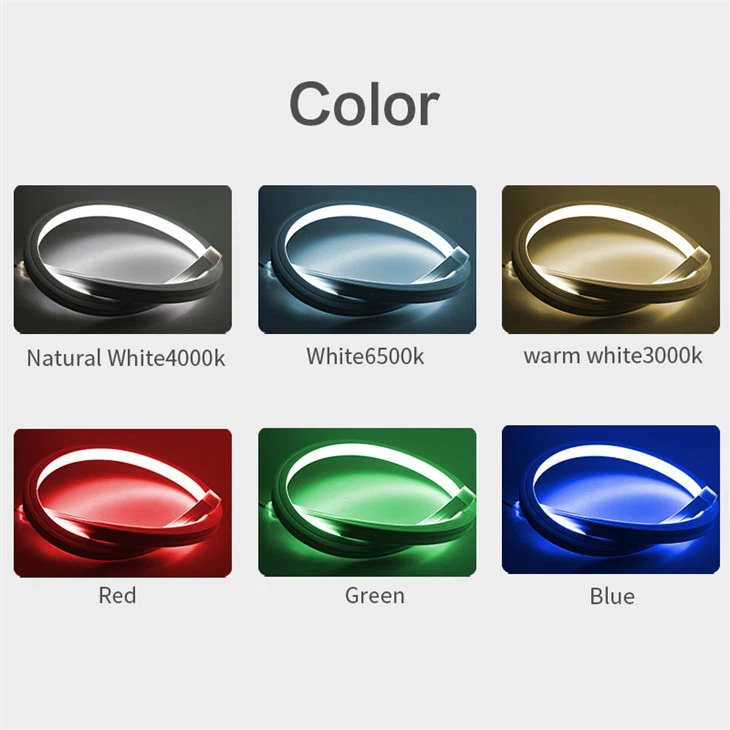
Our Top View Neon Flex products are of the highest quality. They are energy - efficient, long - lasting, and come in a wide range of colors. We use the latest LED technology to ensure bright and uniform lighting. Plus, our products are easy to install, making them a great choice for both beginners and professionals.
If you're interested in purchasing our Top View Neon Flex products or have any questions about installation, don't hesitate to reach out. We're here to help you bring your lighting ideas to life. Whether you're looking to add some ambiance to your home, create a stunning display for your business, or embark on a creative DIY project, our Top View Neon Flex is the perfect solution.
References
- General knowledge of LED neon flex installation techniques.
- Product specifications and user manuals of our Top View Neon Flex products.
