
How do I install RGB LED strips for home decoration?
Thu 18,2025
Leave a message
Installing RGB LED strips for home decoration is a fantastic way to transform the ambiance of your living space. As a supplier of high - quality RGB LED strips, I'm excited to share with you a comprehensive guide on how to install these amazing lighting solutions in your home.
1. Planning Your Installation
Before you start the actual installation, it's crucial to plan out where you want to place the LED strips. Consider the areas in your home that could benefit from a splash of color and dynamic lighting. Popular locations include under cabinets in the kitchen, behind the TV in the living room, along the edges of bookshelves, or around the perimeter of a bedroom ceiling.
Measure the length of the areas where you intend to install the LED strips. This will help you determine how much LED strip you need to purchase. Our RGB LED Strip 120 LED is a great option for areas where you want a brighter and more vibrant display, while the 3838 RGB LED Strip is ideal for more subtle lighting effects.
2. Gathering the Necessary Tools and Materials
Once you've planned your installation and measured the required length, it's time to gather the tools and materials. You'll need:
- RGB LED Strips: As mentioned earlier, choose the appropriate type and length based on your needs.
- Power Supply: Make sure to select a power supply that is compatible with your LED strips. The power requirements will depend on the length and type of the strips you've chosen.
- Controller: A controller allows you to adjust the color, brightness, and lighting effects of the LED strips. There are various types of controllers available, including remote - controlled and smartphone - controlled options.
- Soldering Iron and Solder (Optional): If you need to connect multiple LED strips together or make custom connections, a soldering iron and solder can be very useful.
- Adhesive Mounting Tape: Most LED strips come with adhesive backing, but additional mounting tape can provide extra security.
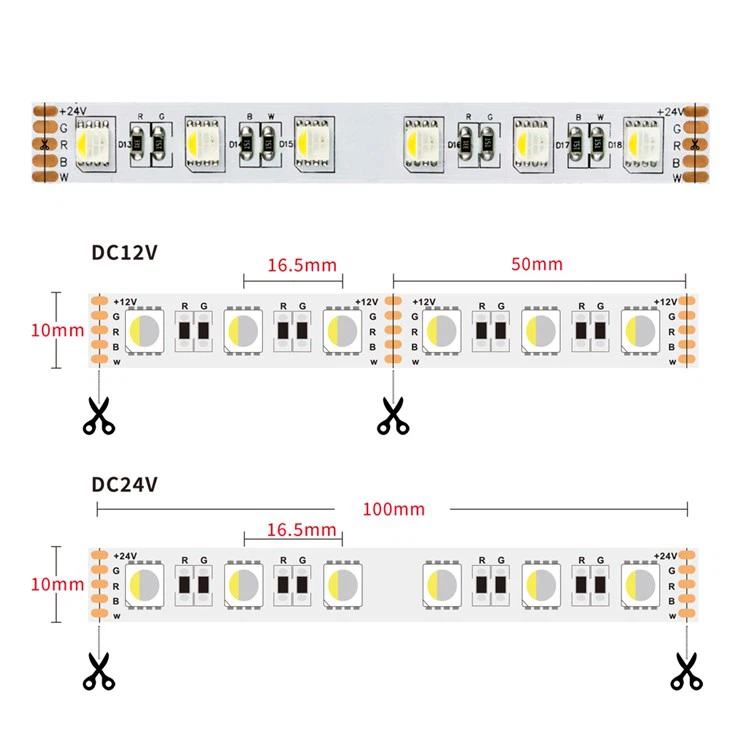
- Scissors or a Utility Knife: You'll need these to cut the LED strips to the desired length. LED strips usually have cutting marks at regular intervals, making it easy to cut them without damaging the LEDs.
3. Preparing the Installation Area
Clean the surface where you'll be installing the LED strips. Remove any dust, dirt, or grease, as these can prevent the adhesive on the LED strips from sticking properly. A clean surface will ensure a long - lasting installation.
If you're installing the LED strips in a damp area, such as a bathroom or kitchen, consider using a waterproof version of the LED strips, like our RGBW LED Strip. This will protect the LEDs from moisture and extend their lifespan.
4. Cutting and Connecting the LED Strips
If your installation area requires multiple LED strips, you may need to cut and connect them. Use scissors or a utility knife to cut the LED strips at the designated cutting marks. Make sure to cut straight and cleanly to avoid damaging the LEDs.

To connect multiple LED strips, you can use connectors or solder the wires together. If you're using connectors, simply insert the wires of the two LED strips into the connector and secure it. If you're soldering, be careful not to overheat the LEDs, as this can cause damage.
5. Mounting the LED Strips
Peel off the backing of the adhesive on the LED strip and carefully press it onto the prepared surface. Start at one end and slowly work your way along the length of the area, making sure the strip is straight and firmly attached. Apply pressure evenly to ensure good adhesion.
If you're installing the LED strips in a curved or irregular area, you may need to bend the strip gently. Most LED strips are flexible and can be bent to a certain degree without damaging the LEDs.
6. Connecting the Power Supply and Controller
Once the LED strips are mounted, it's time to connect the power supply and controller. First, connect the power supply to the LED strips according to the manufacturer's instructions. Make sure the polarity is correct to avoid damaging the LEDs.
Next, connect the controller to the LED strips and the power supply. The controller will allow you to customize the lighting effects, such as changing the color, brightness, and creating dynamic patterns.
7. Testing the Installation
Before you finish the installation, it's important to test the LED strips to make sure they're working properly. Plug in the power supply and use the controller to adjust the settings. Check for any loose connections, damaged LEDs, or other issues. If you encounter any problems, double - check your connections and refer to the manufacturer's troubleshooting guide.
8. Finalizing the Installation
Once you've tested the LED strips and everything is working correctly, you can tidy up the installation. Hide any excess wires using cable management solutions, such as cable clips or conduit. This will give your installation a clean and professional look.
Now that you've successfully installed your RGB LED strips, you can enjoy the beautiful and dynamic lighting effects in your home. Whether you're creating a relaxing atmosphere in the bedroom or a vibrant party environment in the living room, RGB LED strips are a versatile and cost - effective way to enhance your home decor.
If you're interested in purchasing high - quality RGB LED strips for your home decoration project, we'd love to hear from you. Our team of experts can help you choose the right products for your needs and provide you with any support you may require during the installation process. Contact us to start your procurement negotiation and bring your home lighting ideas to life.
References
- General knowledge from the LED lighting industry and personal experience as an RGB LED strip supplier.
