

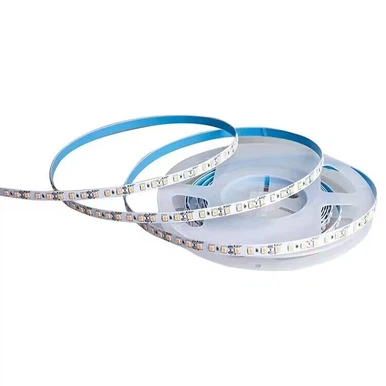
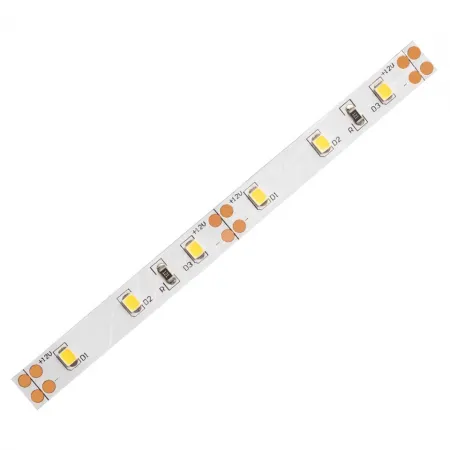
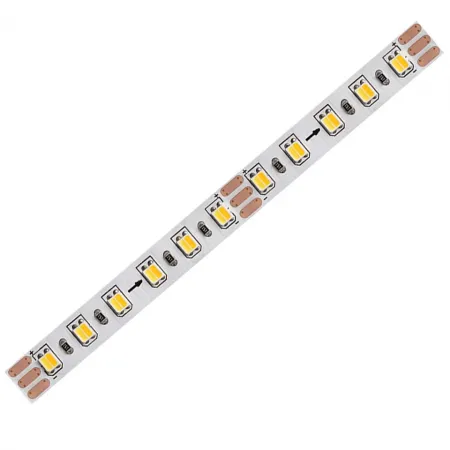
An LED strip light is typically half an inch (10-12 mm) in width, and up to 16 feet (5 meters) or more in length. They can be cut to specific lengths using just a pair of scissors along the cutlines, located every 1-2 inches.
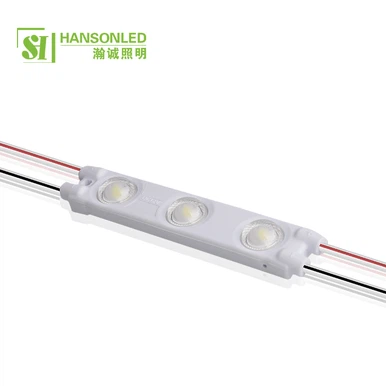
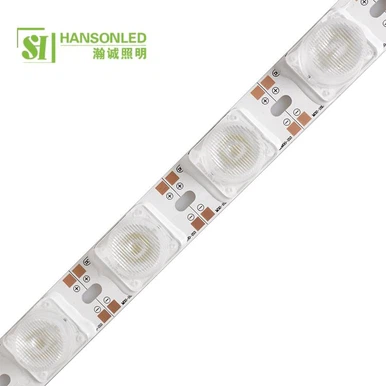
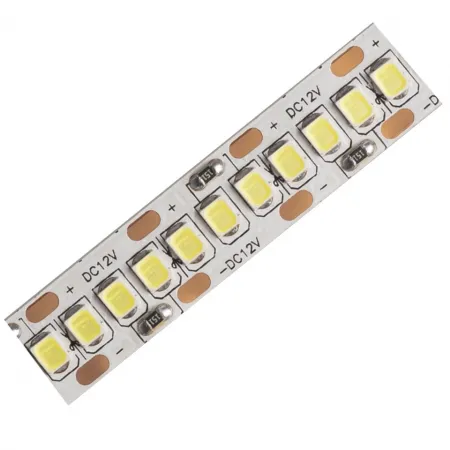
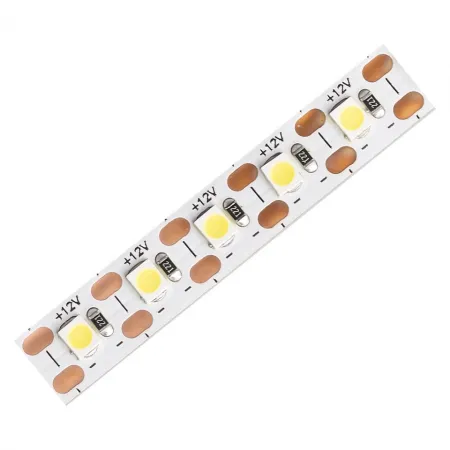
Individual LEDs are mounted along the strip, typically at densities of 18-36 LEDs per foot (60-120 per meter). The light color and quality of the individual LEDs determine the overall light color and quality of the LED strip.
The backside of the LED strip includes pre-applied double-sided adhesive. Simply peel off the liner, and mount the LED strip to virtually any surface. Because the circuitboard is designed to be flexible, LED strips can be mounted on curved and uneven surfaces.
Advantages of Regular LED Strip
Energy Efficiency
LED strip lighting is much more energy efficient than traditional lighting and can save you up to 80% in energy costs. When it comes to energy efficiency, LED strip lighting is in a league of its own. LED strip lighting can save you up to 80% in energy costs compared to traditional lighting sources like incandescent or halogen bulbs. The energy savings are so significant that even after taking into account the initial cost of purchasing and installing LED strip lighting, you can still expect to save money with each and every use.
Flexible
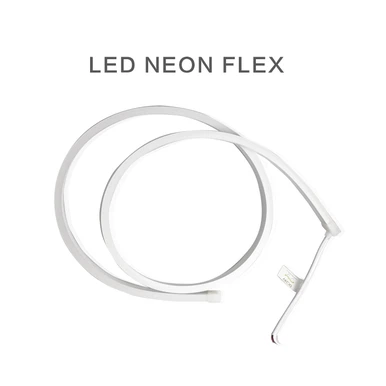
LED strip lights are extremely flexible, allowing you to create custom lighting designs to fit any space. Their versatility makes them perfect for both indoor and outdoor applications. You can install them in your kitchen or bathroom to provide the perfect lighting solution or you can use them outdoors to create a festive atmosphere. You can even apply them to the sides of your vehicle to create a unique and eye-catching look.
Long Lifespan
LEDs last significantly longer than traditional lighting, with a lifespan of up to 50,000 hours. This also helps us save money in the long run, compared to using traditional lighting where we have to keep changing and replacing light bulbs due to their short lifespan. LED strip lights can last up to 50,000 hours while traditional bulbs have an average lifespan of only 1,000 hours. This makes them an ideal solution for any area where you want to create lasting lighting effects.
Low Maintenance
With long lifespans and low energy costs, LED strip lights require minimal upkeep. They don't require much more than an occasional dusting
or cleaning to keep them looking their best. They don't contain any moving parts, so there is no need to worry about them breaking down over time.
Our Factory
HansonLed Ltd is a high-tech green illumination enterprise and a high-tech enterprise in Guangdong province, established in 2013, occupied area of 2,500 square meters factory.
Our Certificate
With senior engineers' professional expertise and continuing research, we have obtained national intellectual property,The company has passed the "ISO9001 international quality system certification" and CE, RoHS, PSE, UL, Reach certificate for dozens of our products. HansonLed owns the strongest R & D team.
Product
HansonLed is foucs on the LED lighting Source products. At present, HansonLed's indoor LED lighting product ranges cover LED Flexible Strips,LED Linear Strip. LED Module, LED Rigid bar, LED Ambient Light hundreds of varieties, widely applied in Channal Letter,Shops sign, Lighting box ,housing and accommodation, public facilities.
Our Service
10 Years Production experience in LED Strip ,LED Module and LED Lighting products.
More stable product quality
Our customers are located in more than 30 countries including North America, South America and Europe. We are located in the industrial belt and can obtain high-quality parts at low cost
OEM/ODM are accepted
You can get the ultimate cost performance by buying our products. Pick up the goods directly from the factory, the price is more favorable
Why Is It Important To Consider LED Strip Width
The width of the LED strip is a crucial consideration because it has a direct impact on the heat dispersion process. Besides, there are some other reasons for which you should consider the LED strip width. These are as follows:
Heat Dispersion: LED strips generate heat while operating. Passing this generated heat in the LEDs to the PCB and thus to the surrounding environment is essential to keep the fixture cool. In this case, having a wider LED strip acts as a heatsink to absorb and distribute heat away from the LEDs. Compared to narrow PCBs, wider ones work more effectively. To learn more about this topic, check out LED Heat Sink: What Is It and Why It's Important?
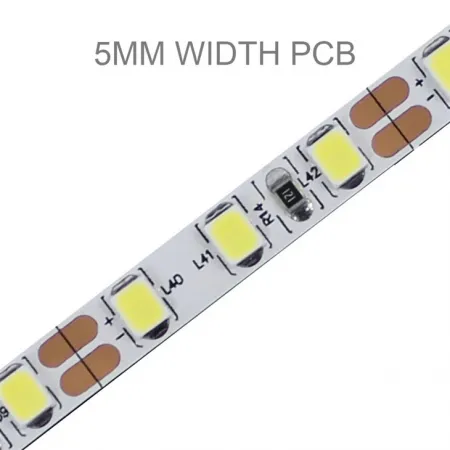
Size of LED Chip: The size of the LED chip must fit the PCB of the LED strips. SMD numbers determine the chip size. For instance, an LED strip of SMD 5050 means the chips have a width of 5.0mm and a length of 5.0mm. So, to fit a 5mm wide LED chip, the width of the PCB or LED strip must be greater than 5mm. If your strip width is smaller than the size of the LED chip, it obviously doesn't make any sense. Usually, SMD 5050 LED strips have a width of 10mm or higher. However, it's a concern of the manufacturers to take care of the compatibility of the LED chip with the strip wide. Nevertheless, you should have some basic idea of different LED chip sizes as they impact the light output. The point to remember is that bigger LED chips need wider PCBs. Check this for details- Numbers and LEDs: What Does 2835, 3528, and 5050 Mean?
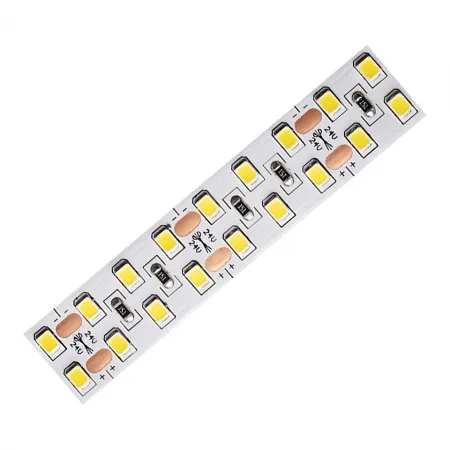
Density of LEDs and Circuit Layout: Wider PCBs allow for a denser arrangement of LEDs and circuits. This is particularly important for RGB and RGBW LED strips, which require multiple channels (4 or 5) to operate correctly. A wider PCB can accommodate these additional circuits, ensuring proper functioning and enhancing the overall light output and color mixing capabilities. For more on the principles of RGB LED strips, read What is RGB Lighting?
Installation Space: If your installation space is very narrow, fitting a wider LED strip can be difficult. So, it is essential to check the width of the LED strip to ensure it fits in the space where you want to install it. Besides, for corners or edges, narrow strips are more suitable as you can easily bend them.
Visual & Light Output: Wide LED strips are more visible, especially when lights are turned off and you have not hidden them. This can be visually unpleasant. In this case, you can go for the narrow LED steps that are not very visible.
Using Aluminum Channels: When you are adding aluminum channels or silicone diffusers to your light strip, the width of the fixture is a crucial consideration. Adding aluminum channels provides a soft and even light output, but if the strip width is not perfect, you will face issues while setting it up. In this case, you need to consider the inner width of the channel to the PCB of your LED strip. For instance, you can't pass a 10mm LED strip to a 5mm aluminum channel or silicon diffuser. For more information about LED aluminum profiles, read Ultimate Guide To Aluminum Profile For LED Strip.
Internal of LED Strip Lights


LED Bead
An LED bead is the main component of an LED strip that emits light. They are made of semiconductor particles that glow when electricity is passed through them. Numerous tiny LED beads are arranged within the LED strips. These beads can be of different sizes. The lighting output of the LED strip lights depends on the number, size, and shape of these beads.
Circuit Board
All the elements of the LED strips are arranged in a printed circuit board, usually termed PCB. These boards are super flexible, allowing you to shape the strip lights as required. The most interesting fact about the PCB is that they have cut markings throughout the body. You can cut it following the marking using a scissor. This helps you to size the strips as per the installation needs.
Resistor
The resistor in the LED strip lights controls the current flow within the strips. If the fixtures run through excessive current, they get damaged. Resistors are installed to prevent such a situation. It keeps the voltage and current flow in check, ensuring optimal performance.
Capacitor
The capacitor is used in LED strips to ensure an even and consistent illumination. It stabilizes the power supply and reduces flickering or other unwanted electrical effects. However, all LED strips don't come with capacitors. It is usually found in advanced strip lights with ICs; Basic LED strips may also have a capacitor.
Diodes
It is crucial to maintain a direction of current flow throughout the LED strips. If, by chance, the current flows reversely, it will damage the LED chips. For these reasons, diodes are used to ensure current flows only in one direction. These are semiconductor devices that also have color-controlling ability. For example, in RGBX LED strips, you can control the intensity of each color (red, green, & blue) by adjusting the current passing through each diode. Thus, it allows you to create up to 16 million hues.
Copper Traces
The copper traces on the PCB of the LED strips work as an electric conductor. It creates a pathway for the current flowing from the power source to individual LED strips and other components. Thus, it connects LED chips, resistors, diodes, and other circuitry. This ensures even electricity distribution throughout the length of the LED strip.
Test the Light Strip and Take Measurements
Before Mounting Your Chosen LED Light Strips, First Plug Them into a Power Source to Ensure That They Work. If They Turn on and Function as Intended, Unplug Them and Proceed. Next, Use a Tape Measure to Take an Accurate Measurement of the Strips Themselves and Your Desired Location
for Them. Depending on the Specific Product, You May Be Able to Cut Light Strips to Fit a Given Space if They're Too Long. However, This Isn't the Case for All Light Strip Products.
Clean and Dry the Installation Surface
Use a Clean Cloth and Warm, Soapy Water (Or Included Alcohol Wipes) to Clean the Area Where the LED Light Strips Will Be Installed. After Cleaning the Installation Surface, Use a Clean Cloth to Dry the Area. As Long as the Area Is Clean and Dry, LED Light Strips Can Adhere to a Range of Smooth Surfaces, Including Wood, Plastic, Metal, And Vinyl.
Peel off the Backing to Expose the Light Strip Adhesive
If You Pull off the Light Strip's Entire Adhesive Backing Immediately, There Is a High Chance That Dirt, Dust, Or Other Debris Will Get Stuck to the Exposed Adhesive Before You Can Finish the Installation. To Avoid This Issue, Gradually Peel off the Backing to Expose About 6 to 18 Inches of Adhesive at a Time.
Apply the Light Strip to the Target Surface
Based on Where the Light Strip Will Plug into a Power Source, Start the Installation Close to This Location. Line up the Light Strip's First Section of Exposed Adhesive Against the Target Surface, Press Firmly, And Smooth the Strip down by Hand. Peel off More Backing to Expose Another Section of Adhesive Before Pressing the Light Strip to the Target Surface. Repeat This Process as Necessary Until You Have Finished Mounting the LED Light Strip to the Surface.
Trim Any Excess Light Strip Length
If Your LED Light Strip Product Can Be Cut and Is Longer Than Required, Trim Any Excess Length off the End of the Light Strip. Refer to the Manufacturer's Directions to Determine Exactly Where to Cut LED Strip Lights to Avoid Damaging the Product. Typically, There Will Be Some Type of Marking on the Light Strip (Such as a Scissors Symbol) to Indicate Where It Can Be Cut. Use Scissors to Carefully Snip off Extra Light Strip Sections and Properly Dispose of Them.
Turn on the Light Strip
Connect the LED Light Strip to the Power Outlet and Turn It on to Test if the Installation Was Successful. Ideally, The Lights Will Turn on and Respond to the Remote Control, LED Light Strip App, Or Even Voice Commands, Depending on the Product.
Refer to the Manufacturer's Troubleshooting Instructions if the Light Strip Doesn't Turn on or Flickers When It Shouldn't, Even After Unplugging and Plugging It Back in to Reset the Light Strip. The Issue May Be Due to a Loose or Damaged Pin Connection. Check the Pins for Damage and Reconnect the Strip Lights, Ensuring the Connections Are Secure. If This Does Not Resolve the Problem, You May Need to Repair the Pins or Replace the Damaged Light Strip Before Proceeding.
Measure the LED light strip
Never cut LED strip lights before measuring and marking the desired length. Use a tape measure to check the light strip's length and compare it to the spot where it will be instalLED. Once you're satisfied with the measurements, you can proceed. However, not all light strips can be cut. Check the product details and manufacturer instructions before cutting a light strip.
Locate the indicated cut line
After referring to the manual, inspect the light strip to locate the specified areas where you can safely cut through the light strip without damaging its functionality. These spots are often indicated by scissor symbols, though the exact symbol might vary from product to product.
Cut and test the light strip
Check the measurements once more to ensure you're cutting the light strip to the correct length. Then, use scissors to cut a straight line through the LED light strip. Test the light strip by plugging it in; if it still turns on and functions as intended, your cut was successful.

Check Power Source
There are several common issues that can crop up with the power supporting your LED strip lighting. The first is a defect or disruption in the power source.
First, test the socket or battery pack for power. If none of your LED lights are functional, it may be due to a problem with the power source itself. You can test an electrical socket by simply plugging in another device and determining whether there is power.
If the test device functions, then your problem lies elsewhere. If not, check switches in the room and then the circuit breaker box .
Test Voltage
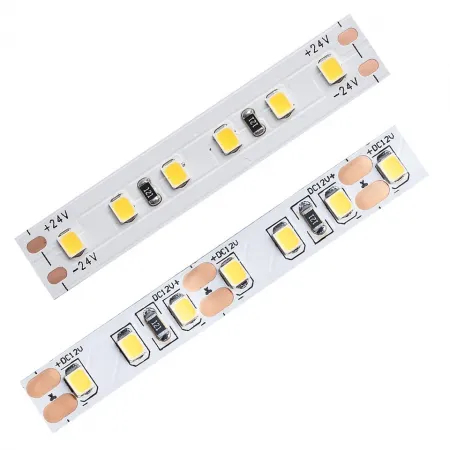
LED strip lights run on DC power, either 12V or 24V. To convert the power coming from a standard AC socket in your home or building, you'll use a power supply, transformer or driver, commonly referred to as a power supply. This unit plugs into your home's current and converts the electricity to a current that the light strips can use.
Alternatively, You can use a DC Voltage Regulator for a constant voltage for your LED strip. A voltage regulator can be connected to a battery unit to ensure a steady constant voltage supply through all operational conditions. It also regulates voltage during power fluctuations and variations in loads. If your lights are failing while running on a battery supply, it may be time to replace or recharge the batteries.
To test voltage, you will need a DC volt meter. This little meter will allow you to measure how much voltage is coming from the power supply to your light strips. If the voltage reading is less than the voltage for which the lights and power supply are rated, you will need to remedy the problem with fresh batteries or perhaps a new power supply.
Confirm Compatible Parts
Ensure that if the power supply is rated for a 12V strip, you are not trying to use it with a 24V strip, and vice-versa. Your power supply must be compatible with the voltage requirements of your LED strip. These ratings are printed both on the strip and the power supply units.
Test Accessories
Check any other devices you are using, such as a dimmer. All parts must be compatible and operational for your lighting to function properly and safely.
The simplest way to test whether accessories are causing a problem is to remove them from the equation. If your power supply and light strips
work correctly without the dimmer, for example, you have determined that the problem originates with the dimmer.
Note that you should never attempt to connect your LED lights to AC current without an appropriate power supply driver. You can remove accessories, but never try to connect the system without the transformer.
Examine Connections
If your power supply, accessories, and voltage are in good order, the next common culprit is a poor connection. Clearly, if power can't reach every part of your light strip, you will have lights that don't work.
The most likely place for a poor connection along an LED strip is at a solderless connector. If you have a multimeter, you can check voltage along the strip and narrow down the location of a bad connection quickly. If not, visually examine each connector for loose wires. You may also find loose wires where they connect to your power supply adapter.
Short circuits, which occur when positive and negative wires touch, are another possible reason that your strip lights will fail. This is more likely if you are doing your own soldering, but it can happen even with solderless connectors.
Occasionally when you cut the strips on the cut line, you will experience a less-than-perfect cut and the fine copper wires of the strip can be flattened enough that they will contact each other. A visual examination should allow you to locate damaged wires on a cut
How To Troubleshoot a Broken LED Strip Lightline.
FAQ
We're well-known as one of the leading regular LED strip manufacturers and suppliers in China. Our factory offers high quality regular LED strip made in China with low price. Welcome to contact us for customized service.
